Top Ad 728x90

samedi 17 janvier 2026

3 Colors You Should Never Wear to a Funeral

by


While traditions may vary from country to country, there are certain colors that are widely considered inappropriate in most settings. Wearing them can unintentionally send the wrong message or appear disrespectful at a moment when compassion matters most.

Here are three colors you should avoid wearing to a funeral, along with the reasons why.

1. Bright Red

For illustrative purpose only
Red is perhaps the most controversial color to wear at a funeral. In many cultures, red symbolizes passion, celebration, or even good luck. For example, in weddings across parts of Asia, red is seen as a joyful color.

At a funeral, however, the same brightness can appear jarring and deeply inappropriate. In Western traditions, red may be interpreted as attention-seeking, suggesting that the person wearing it wants to stand out rather than blend into a somber occasion. Imagine a sea of black and muted colors, and suddenly a bright red dress or tie catches every eye—it immediately distracts from the purpose of the gathering.

Unless you are in a culture where red is specifically requested by the family to symbolize life or rebirth, it is best to avoid this color entirely.

2. Neon or Vibrant Shades (Pink, Yellow, Green, Orange)

For illustrative purpose only
Funerals are not the place for bold, eye-catching hues. Neon pink, bright yellow, lime green, or vivid orange may look great at a party, but at a funeral they can seem careless and disrespectful. These colors often carry associations with energy, youth, and fun, which directly clash with the tone of mourning.

Even if your intention is innocent, wearing such shades can give the impression that you are not taking the service seriously. Neutral, darker tones—like navy, charcoal, deep brown, or muted pastels—are far more appropriate. The goal of funeral attire is not to draw attention to yourself but to show quiet support for the grieving family.

3. Shiny Metallics (Gold, Silver, Sequins)
While technically not a “color” in the traditional sense, metallic fabrics and sequins deserve a place on this list. Shiny clothing reflects light and immediately catches attention, which can feel like an attempt to make a fashion statement at a deeply serious gathering.

A glittery gold blouse or a sequin-covered dress, no matter how stylish, sends the wrong signal at a funeral. Similarly, silver or other metallic tones often appear celebratory, making them better suited for weddings or festive occasions. At a funeral, restraint and subtlety are far more important than glamour.

For illustrative purpose only
What to Wear Instead
If you are unsure, the safest choice is always black, as it has long been associated with mourning and respect in many cultures. However, other subdued colors are also appropriate, such as dark navy, charcoal gray, or deep brown. For women, simple dresses, skirts, or tailored pantsuits work well. For men, a dark suit with a conservative tie is appropriate. Accessories should also be modest, avoiding flashy jewelry or loud patterns.

Final Thoughts
Clothing may seem like a small detail in the face of loss, but it plays a powerful role in showing empathy. By avoiding colors like bright red, neon shades, and shiny metallics, you signal to the grieving family that you respect both the occasion and their emotions.

 

These are the signs that he is…

by


Oral cancer, also known as mouth cancer, is a type of cancer that affects the mouth and throat. It is often diagnosed when the disease has progressed to the point of spreading to the lymph nodes in the neck. However, if detected early, the chances of successful treatment are significantly higher. In this article, we will explore the symptoms, causes, stages, and treatment options of oral cancer based on reliable medical sources.

What is oral cancer?

Oral cancer is part of a larger group of cancers known as head and neck cancers. It typically develops in the tissues of the lips, gums, tongue, and palate. While it can affect people of all ages, the risk increases with age, especially in people over 40. Men also have a higher risk of developing oral cancer compared to women.

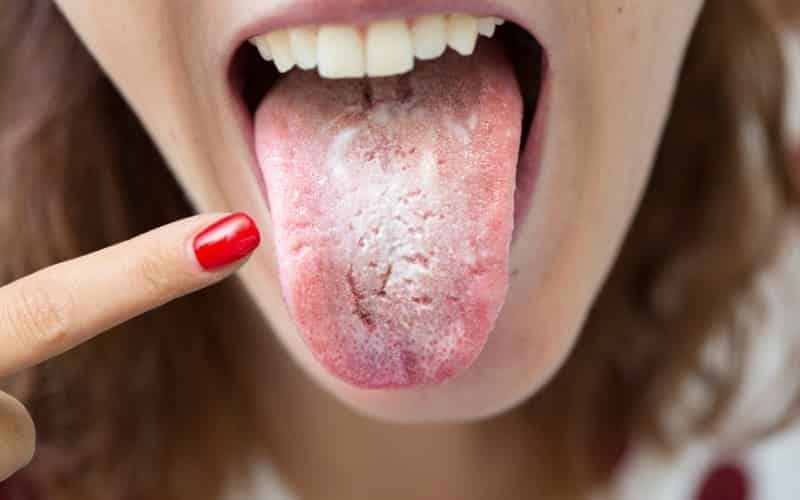
What does your tongue say about your oral health?

Types of oral cancer

Oral cancer can affect various parts of the mouth, including:

  • Lip cancer  : affects the skin of the lips.
  • Tongue cancer  : affects the tongue and is more common on the side of the tongue.
  • Inner cheek cancer  : affects the inner lining of the cheeks.
  • Gum cancer  : affects the gums surrounding the teeth.
  • Cancer of the floor of the mouth  : affects the area under the tongue.
🎯Relationship amzio efa kara ampoule vita chinois 😆,am voalohany miretry be. Tsy aila iz ts dia mazava,ndraik may farany😂 🔴DKS

Symptoms of oral cancer

In its early stages, oral cancer may not present any noticeable symptoms, making it difficult to detect without a thorough examination. However, as the cancer progresses, the following symptoms may appear:

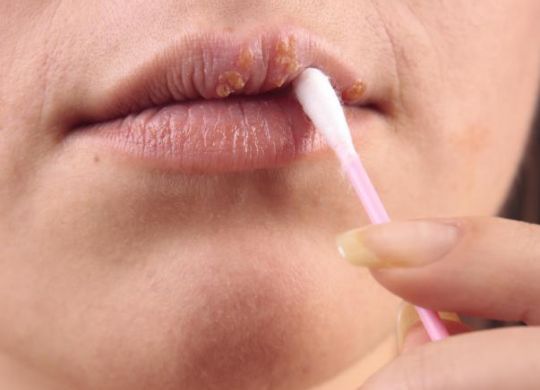
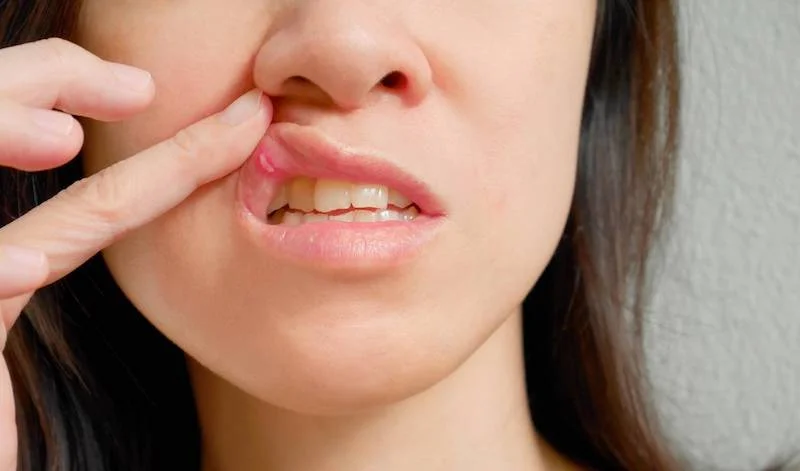
  • Sores or blisters that do not heal on the lips or inside the mouth
  • Swelling or enlargement of the mouth
  • Bleeding from the mouth
  • Loose teeth or jaw pain
  • Difficulty swallowing or pain when swallowing
  • Earaches or pain in the neck area.
  • Sudden weight loss
  • Numbness in the lips, face, or neck.
  • Red or white spots on the mouth or lips.
  • Persistent sore throat or dry mouth

If any of these symptoms persist, it is important to consult a dentist or healthcare professional for an evaluation. Early detection is crucial for a better prognosis and higher survival rates.

Solutions for treating lichen planus: Causes and symptoms. Lichen planus is a serious skin disorder that can affect anyone, regardless of age or sex. It must be treated at its source.

Causes of oral cancer

Several factors contribute to the development of oral cancer, and the most common causes include:

See continues on the next page

  1. Tobacco use  : Smoking cigarettes, cigars, or smokeless tobacco significantly increases the risk of developing oral cancer. Approximately 80% of oral cancer cases are related to tobacco use.
  2. Excessive alcohol consumption  : Drinking alcohol in large quantities increases the risk, especially when combined with tobacco use.
  3. Human Papillomavirus (HPV)  : Certain strains of the HPV virus, particularly HPV-16, have been linked to an increased risk of oral cancer.
  4. Poor diet and nutrition  : A diet lacking essential vitamins and nutrients, especially fruits and vegetables, can increase susceptibility to oral cancer.
  5. Age  : Oral cancer is more common in older adults, particularly those over 50 years of age.
  6. Family history  : A family history of cancer may increase the likelihood of developing oral cancer.

Stages of oral cancer

Oral cancer progresses in stages, which helps determine the extent of the disease and guide treatment decisions. These stages include:

  • Stage 1  : The tumor measures less than 1 inch and has not spread to nearby lymph nodes.
  • Stage 2  : The tumor grows between 1 and 2 inches, but remains localized without spreading to the lymph nodes.
  • Stage 3  : The tumor is larger than 2 inches and may have spread to nearby lymph nodes, but not to other parts of the body.
  • Stage 4  : This is the most advanced stage, where the cancer has spread to surrounding tissues or other parts of the body, including distant organs.

The stage of the cancer helps determine the appropriate treatment options and also gives an idea of ​​the prognosis.

The best homeopathic treatments for mouth ulcers in 2023

Treatment for oral cancer

Oral cancer can be treated with a combination of surgery, radiation therapy, and chemotherapy. The choice of treatment depends on the size, location, and stage of the cancer.

See continues on the next page

  1. Surgery  : In the early stages, surgery is the primary treatment. The tumor is surgically removed, and the affected part of the mouth is reconstructed. In more advanced stages, surgery may involve removing larger portions of the mouth or jaw.
  2. Radiation therapy  : Radiation therapy uses high-energy rays to attack and destroy cancer cells. This treatment may be used after surgery to eliminate any remaining cancer cells or to treat tumors that cannot be surgically removed.
  3. Chemotherapy  : Chemotherapy uses anticancer drugs to kill cancer cells throughout the body. It is often combined with radiation therapy, especially in advanced cases, to increase the effectiveness of the treatment.
  4. Targeted therapy  : This treatment focuses on specific molecules involved in the growth of cancer cells, helping to stop the growth and spread of the tumor.

In many cases, a combination of these treatments is used to achieve the best result.

Herpes: Treatment of cold sores and other symptoms - DMSI

Prevention and early detection

While certain risk factors for oral cancer, such as genetics or age, are beyond a person’s control, adopting a healthy lifestyle can help reduce the risk. The following measures are important for preventing oral cancer:

  • Quitting smoking and avoiding tobacco products  : this is the most important preventive measure.
  • Limit alcohol consumption  : Reducing alcohol consumption can help reduce the risk of oral cancer.
  • Follow a balanced diet  : a diet rich in fruits and vegetables can help reduce the risk of oral cancer.
  • Regular dental checkups  : Regular visits to the dentist for oral exams can help detect early signs of oral cancer.
  • HPV vaccine  : The HPV vaccine can help prevent certain strains of the virus that increase the risk of oral cancer.

Conclusion

Oral cancer is a serious but treatable condition if detected early. With appropriate lifestyle changes, regular checkups, and a preventative approach, the risk can be significantly reduced. If you experience symptoms such as persistent sores, pain, or changes in your mouth, it is important to seek medical attention immediately.


Unlock The Secrets Of Successful Nighttime Adventures With One Brilliant Tool!

by


Night fishing is a different experience that encompasses the tranquility of being in the open space as well as getting the catch. For this, anglers use modern equipment, and one of them is the LED light stick – a small, but very useful device that has significantly improved the nighttime fishing. This LED light stick is intended to be used as a fishing float accessory and not only enhances the visibility of fishing floats but also enhances the fishing experience especially at night.

A light stick for fishing is a small and portable light which is used with a fishing float or line. These are light sticks which are usually small and are powered by small batteries; these light sticks make the fishing float very conspicuous through the light produced. These can be obtained in different colors like green, red, and blue among others, the color can be used to represent float size, fishing line length among others to assist the fishermen in easy management of their fishing gears.

source: eBay

The main advantage of an LED light stick is that it provides better visibility in the area. Thus, using the fishing float, the anglers can easily follow the line and its movements including from a distance. This visibility is important especially during night fishing because it is difficult to monitor the several floats that are in the water. These sticks can also help attract fish since some fish are attracted to light, and thus the chances of catching a fish are higher.


LED light sticks are green products; many of them are reusable and have batteries that can be changed. This aspect is very vital especially in the fishing industry where the health of the environment is a major concern. First, LED lights are safer than glow sticks that have chemicals inside and if they break, the chemicals can be dangerous.

source: eBay

Apart from their use, LED light sticks have also found their way in the fishing fraternity, especially the night fishing enthusiasts. They are also used in recreational fishing tournaments where they increase the fun and appeal of the events.

Therefore, it can be said that the Fishing Float Accessory LED Light Stick is not just a tool, but rather a valuable asset to fishing at night that ensures safety, productivity, and style. This application in the fishing equipment is a clear demonstration of how even the most basic inventions can drastically transform age-old practices.

source: eBay

ADVERTISEMENT

Best Homemade Herbicide: Non-Toxic Solution (Dries Weeds Within 2 Hours)

by


Removing garden weeds or those growing in cracks and crevices can be an expensive and tedious task—especially when using commercial chemical products.
How to Prepare an Effective Homemade Herbicide

This homemade  weed killer is a safe, inexpensive, and effective alternative to eliminate weeds without resorting to harmful chemicals. With simple household ingredients and a quick preparation method, you can keep your garden free of unwanted weeds in no time.
Ingredients (for 500 ml)

500 ml of water

1 tablespoon of salt

1 tablespoon of baking soda

5 tablespoons of liquid dish detergent

To make a larger quantity, simply double or triple the ingredients as needed.

Instructions

Prepare the Mixture

Pour 500 ml of water into a container using a funnel.

Add 1 tablespoon of salt and 1 tablespoon of baking soda.

Add 5 tablespoons of liquid dish detergent.

Mix Well

Stir until the ingredients are completely dissolved.

Transfer the mixture to a spray bottle.

Apply the Herbicide

Shake the spray bottle well before each use to prevent the salt from settling.

Spray directly onto the unwanted weeds, soaking the foliage thoroughly.

For best results, apply during the hottest part of the day when the sun is strongest.

Tips & Recommendations

Weather Conditions:
Avoid applying the solution if rain is expected, as it may dilute the  herbicide and reduce its effectiveness. A hot, sunny day yields the best results.

Expected Results:
Initial effects—such as wilting or color change—can be seen within hours. Weeds should be completely dry and brown or purplish within 5 days.

Caution:
This solution is non-selective and can damage or kill any plant it touches. Avoid spraying near flowers, lawns, or other desired vegetation.

vendredi 16 janvier 2026

Discover this Vinegar Trick to Get Crispy French Fries

by


Alone or as an accompaniment, fries are a must in the kitchen. But successfully cooking them while ensuring that they are not too greasy is not always easy. Fortunately, there is an infallible trick to preserve their crispness and their melting heart without being coated with oil. From the variety of your potato to the cooking methods, discover all our tips for delicious fries.

Ingredients
Potatoes 1kg
Sunflower oil c/n
Cold water c/n
White vinegar 2 tsp
Preparation

Peel the potatoes and cut them into sticks about 1 cm thick (you can leave them with the skin but you have to wash them very well).
Put the cut potatoes in a large container and pour water to cover them.
Add the two tablespoons of vinegar and mix a little.
Leave to rest in the refrigerator for at least 20 minutes. An hour would be ideal.

Remove the potatoes from the water and dry them as much as possible (you can use a kitchen towel or napkins).
Heat the oil in a pot or skillet suitable for frying.
Fry the potatoes in as many times as necessary.
Enjoy the crispiest potatoes ever!

Love it when it’s streak-free!

by


Cleaning windows can often feel like a tedious chore—especially when streaks appear and undo all your hard work. Everyone loves the look of sparkling, clear glass, but finding the right method to achieve that can be surprisingly tricky.

Luckily, thanks to a simple trick my grandpa taught me, getting streak-free windows can be quick and almost effortless. Imagine finishing the job in just three minutes!

It’s easy to get frustrated with countless products that promise spotless results but leave behind smudges. This tried-and-true method, passed down through generations, will change the way you clean your windows forever.

What You’ll Need

  1. A bucket of warm water
  2. A few drops of dish soap
  3. A squeegee
  4. A microfiber cloth
  5. (Optional) A splash of white vinegar for extra shine

Steps to Streak-Free Windows

Steps to Streak-Free Windows

  1. Fill a bucket with warm water and add a few drops of dish soap. Stir gently to mix.
  2. (Optional) Add a splash of white vinegar for additional cleaning power.
  3. Dip your microfiber cloth into the soapy water and wring it out until it’s damp, not dripping.
  4. Wipe the entire window surface thoroughly with the cloth.
  5. Immediately after wiping, use the squeegee—starting from the top and pulling down in one smooth motion.
    • Wipe the squeegee blade with a clean towel after each pass to prevent streaks.
  6. Finish by buffing any remaining moisture or marks with a dry microfiber cloth.

The Result

This simple, time-tested method combines efficiency and effectiveness. In just a few minutes—and with basic household items—you can achieve crystal-clear, streak-free windows that truly shine.

No fancy products. No wasted effort. Just clean, flawless glass—every single time.

Just One Piece Can Make Your Peace Lily Bloom All Year Long

by


The peace lily (Spathiphyllum) is one of the most loved houseplants for a reason. It’s elegant, easy to care for, and known for its beautiful white blooms that rise gracefully above glossy green leaves. But many plant owners are disappointed when their peace lily stops blooming after the first few flowers fade. Even with proper care, new flowers can be few and far between.

If your peace lily is healthy but not blooming, there’s a surprisingly simple trick that could turn things around. You don’t need special fertilizer or expensive plant food—just one piece of a common household item might be enough to trigger blooming that lasts all year round.

The Secret: Garlic Clove in the Soil
Yes, it sounds unusual—but many gardeners have found that placing one clove of garlic in the soil can make a remarkable difference. This natural method is easy to apply, safe for the plant, and incredibly cost-effective. The garlic clove acts as a gentle stimulant, helping to improve soil quality, deter harmful microbes, and possibly even encourage flowering.

Why Garlic Works
Garlic contains natural compounds such as allicin, which have antifungal, antibacterial, and antioxidant properties. When buried in the soil, garlic can help suppress harmful soil-borne pathogens that may be silently affecting the plant’s ability to thrive.

But garlic doesn’t just fight off pests—it may also enrich the root environment, promoting stronger root systems and healthier overall growth. Healthier roots mean better nutrient uptake, which in turn supports more vigorous flowering.

In many cases, peace lilies that hadn’t flowered in months began to produce buds within a few weeks of trying this method. While it may not work for every single plant, the results have impressed enough home gardeners to make it worth trying.

How to Use the Garlic Clove Method

Here’s how to try this simple yet effective method at home:

  1. Choose a Fresh Garlic Clove
    Use one firm, raw garlic clove. It should be free of mold, soft spots, or green shoots. Do not use processed garlic, garlic in oil, or dried garlic powder.
  2. Peel and Prepare
    Peel the clove but do not cut or crush it. It should remain whole for slow release of its natural compounds.
  3. Plant in the Pot
    Push the garlic clove about 2 to 3 cm (1 inch) into the soil near the edge of the pot, away from the plant’s central roots. Avoid placing it directly next to the stem, as this could interfere with water flow or root development.
  4. Water Lightly
    After placing the garlic, water the plant as usual. The garlic will slowly release its compounds into the soil over the coming weeks.
  5. Replace Every 6–8 Weeks
    Over time, the garlic will break down. After about 6 to 8 weeks, remove any remaining pieces and replace with a new clove if desired.

What Results to Expect

With good care and this garlic method in place, you may begin to see:

  • Improved foliage health: Leaves become a deeper green and less prone to yellowing or spotting.
  • New flower stalks: Within a few weeks, you may notice new flower buds forming—even if your plant hasn’t bloomed in a long time.
  • Ongoing flowering: When repeated seasonally, this trick may help maintain a near-continuous cycle of blooming.

Many home gardeners have reported that their peace lilies, previously considered “just green plants,” started blooming regularly across all four seasons with just this small change.